


Basic Basing
While some people like to just leave the bases of their models plain black, adding some colour and texture is a great way of finishing off a painted model and bringing it to life. There are countless different ways that you can do this, depending on the specific look you want to go for, and we'll cover some of those in other articles, but here we'll run through the most common way to texture your bases, using sand.
First: Adding the texture!
Sand is glued onto the base using PVA glue. Gaming stores and hobby stores will often sell modeling sand or gravel mixes in a range of different textures and volumes. Play sand for sandpits can also be used, and silver sand, sold in pet stores for use in aquariums, crab habitats and bird cages, is great for a really fine texture.
A note on glue: Some people use superglue to attach the basing sand, but this isn't really ideal. Applying enough superglue to cover the top surface produces a lot of nasty fumes and can irritate your eyes and lungs. It's also really difficult to clean off if you accidentally get some glue on the model!
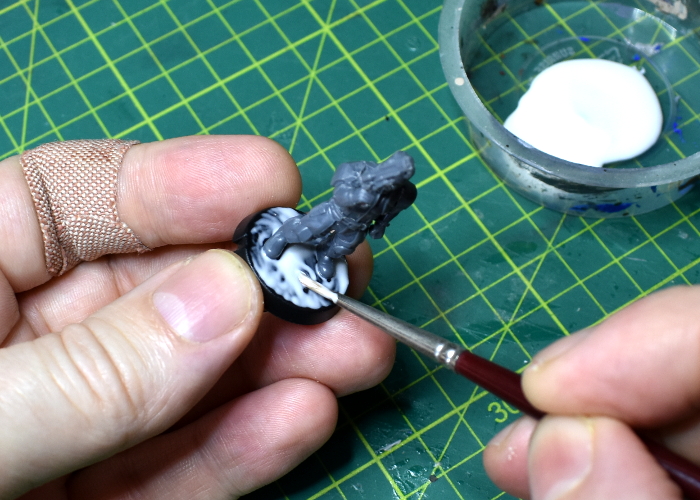
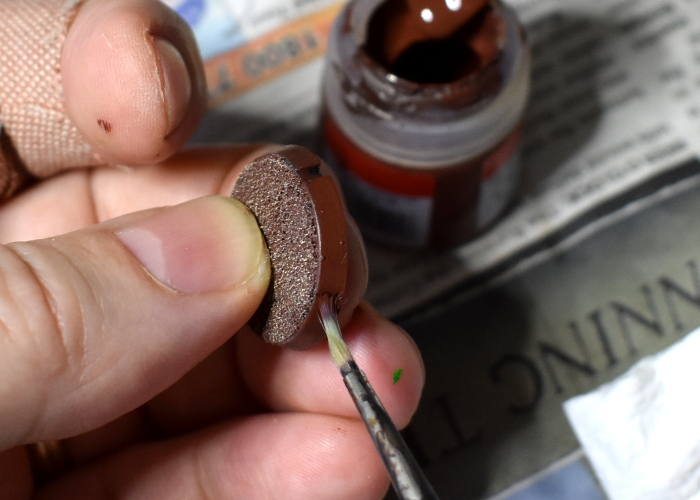
Start by using an old brush to paint the PVA glue onto the base, covering the entire open top surface but not the sides. This is best done after the model is glued on, as it winds up looking more natural than having the model balancing on top of the texture. It's also generally far easier to glue the model to the base than to glue it to a layer of sand or a rough gravel surface! If you get any excess glue on the model, you can use a clean, wet paintbrush to wipe it off.
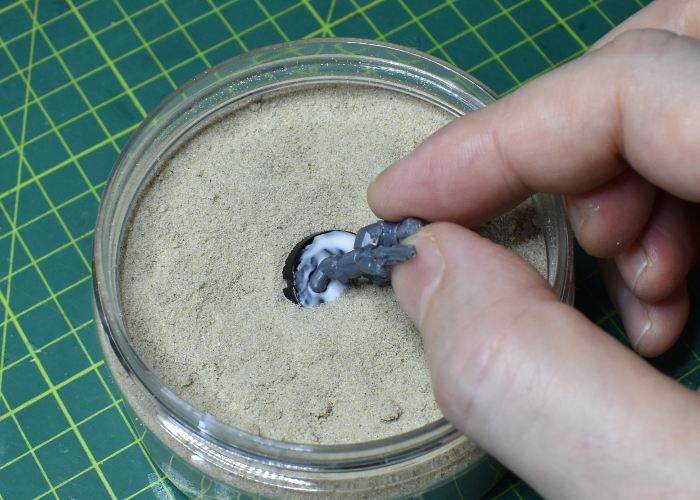
Once the glue is applied, dip the base into your sand, making sure you get the sand over the whole base. Tip off any particularly loose excess sand, but don't get too zealous with this - some of the slightly loose sand will stick as the glue dries, so it's best to not disturb it too much at this point.
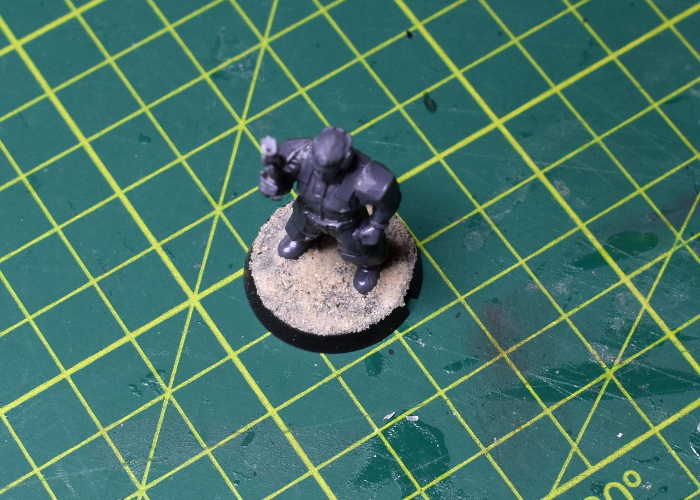
If there is any sand sticking to the sides of the base, you can use a fingertip or a piece of paper towel to gently wipe it away, leaving a neat edge around the top surface of the base. Then set the model aside to let the glue completely dry. PVA glue softens when moisture is applied to it, so if you try to paint it before it is completely set you can dislodge the sand. Once the glue is dry, tap or brush off any remaining loose sand.
Time to paint!
Hang on... why are we painting sand and gravel? Doesn't it already look like dirt?
Well, no, it doesn't. When we paint miniatures, we tend to over-emphasise shading and highlights, because light falls on a 30mm tall figurine differently to the way it does on a full-sized person. Your basing material is no different - if you leave it unpainted, it won't look like dirt, in scale with the model. It will look like unpainted, full sized sand glued to the model's base. Painting it to match the model makes the whole thing look more coherent.
SO, we start by choosing a basecoat colour, and painting this over the entire base. (We're using a spare base here, just for an example. As mentioned before, the base would normally be attached to a model for this part!) It's best to use old brushes for painting sand bases, as it is a little like painting sandpaper, and will wear out your brushes rather quickly.
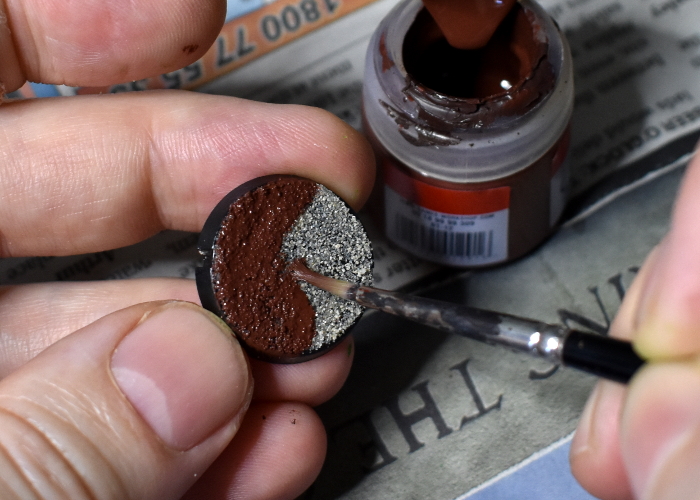
For quick and easy basing, we can generally use two colours - the basecoat, and a highlight colour. Once your basecoat is dry, apply a light drybrush of the highlight colour over the sand. If you're unfamiliar with drybrushing - use a soft, flat or round tipped brush. Dip it in the paint, and then wipe it gently on some paper until there is only a slight amount of colour still coming off. Then brush that over the surface, where it will just pick up the raised detail and leave the darker basecoat in the crevasses.

Finally, go back around the edge with the basecoat colour, applying however many coats it needs to get a neat, even finish.
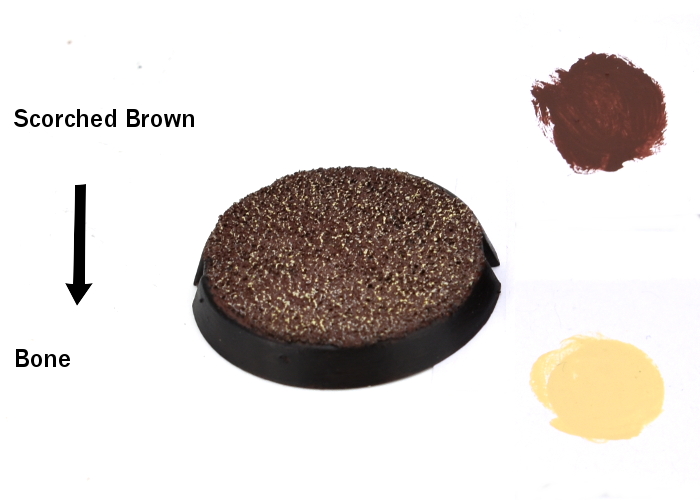
You can get a huge variety of different base styles using this technique, just through your choice of colours. For the example above, we used some old Citadel Scorched Brown for the basecoat, and then Coat D'Arms Bone for the highlight.

Some painters like to use a plain black edge, instead of the base colour. Below is a base with the same colours as above, but with the edge painted black. You could also use a different, contrasting colour, if that works for the look you want.
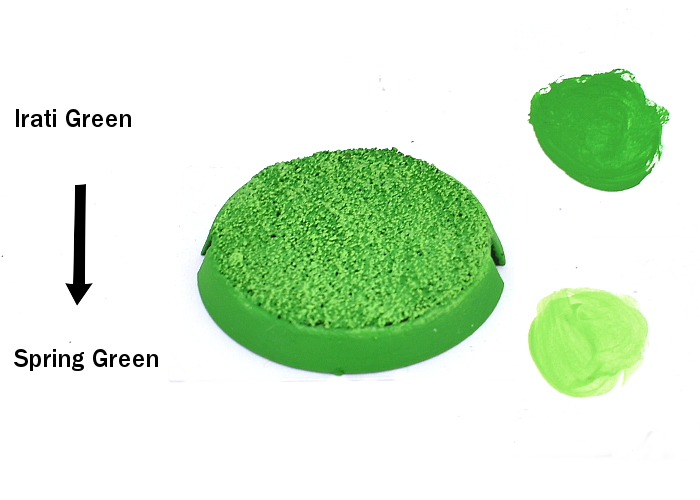
Below are some examples using different colours, starting with a very traditional (but somewhat out of favour, these days, grassy green! This used Scale75 Irati Green for the basecoat, and Spring Green for the highlight.
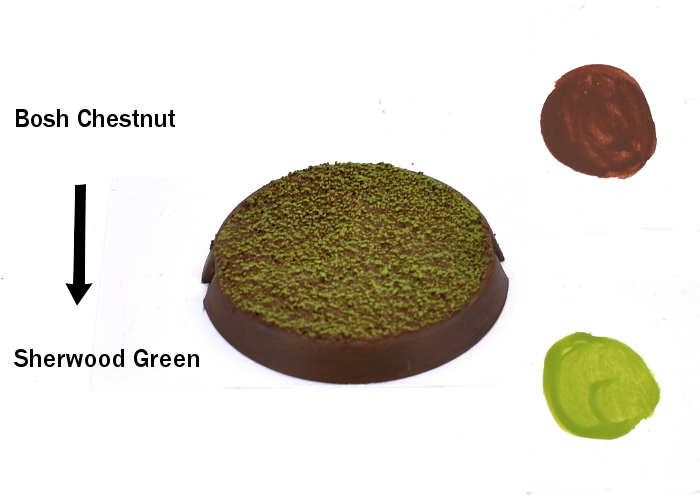
To give the grassy finish some more depth, you can use a brown basecoat with the green over the top. Here, we've used Scale75 Bosh Chestnut with Sherwood Green.
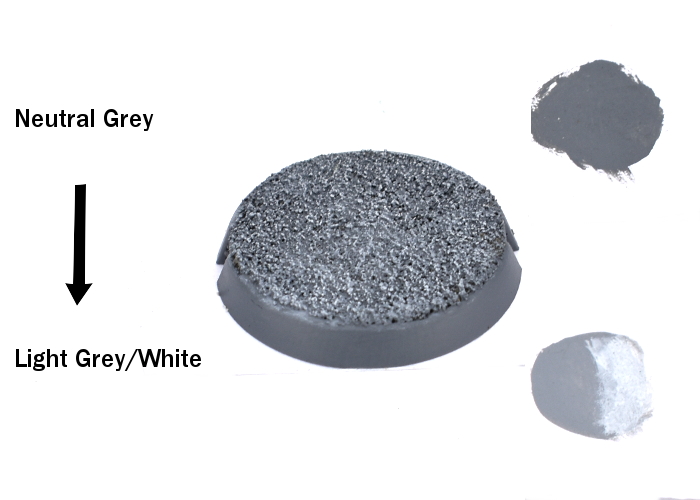
For a barren waste or urban feel, you can use greys - below is Vallejo Model Color Neutral Grey, with Light Grey mixed with a little white for the highlight.
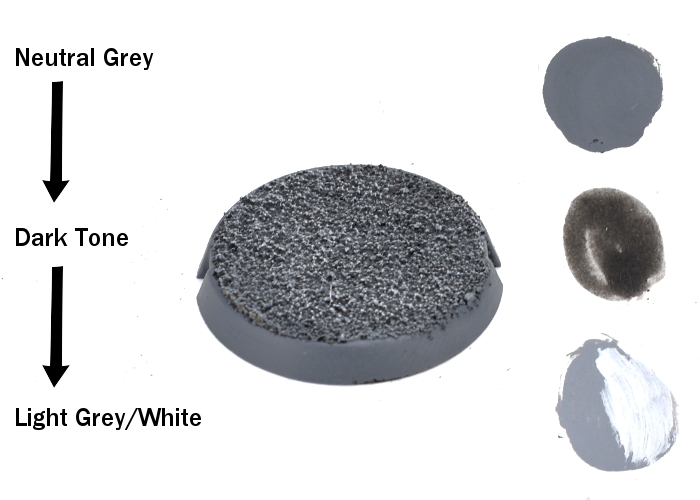
To give a darker tone to the base, you can use an ink wash in between the paint layers. This one has the same colours as above, but with a coat of Army Painter Dark Tone applied over the basecoat.
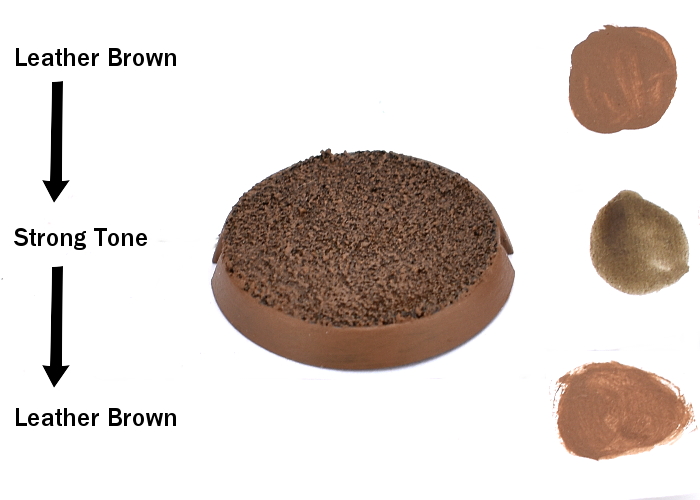
Using a wash also lets you keep everything a little darker if you wish. This one was painted with Army Painter Leather Brown, then given a wash of Strong Tone and a highlight with some more Leather Brown.
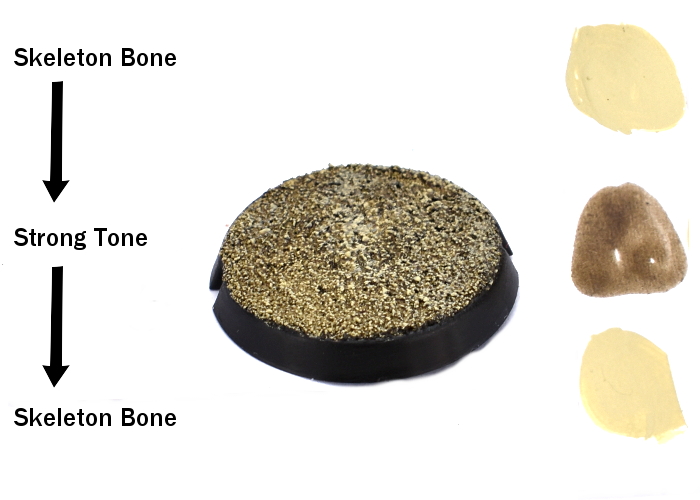
Keeping to the wasteland theme, the below base was painted with Army Painter Skeleton Bone, washed with Strong Tone and then drybrushed with more Skeleton Bone.
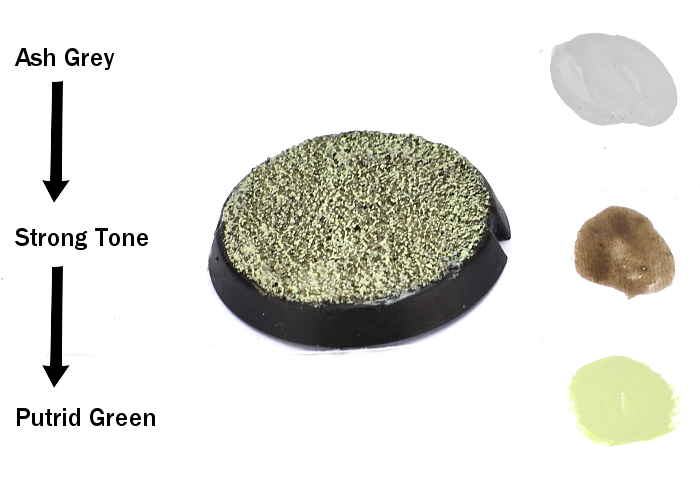
Finally, mixing up the tones can give you a wasteland vibe. Here, we've used Army Painter Ash Grey, washed with Strong Tone. Over this we have applied a highlight of Coat D'Arms Putrid Green. The end result is similar to the Skeleton Bone version above, but with a very slight green tinge to it.
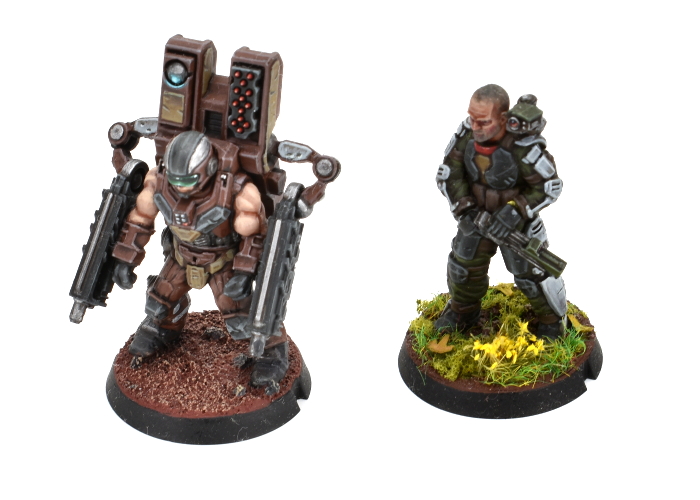
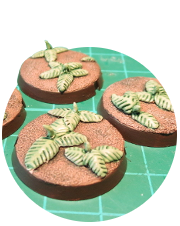
Of course, you don't have to stick with just the sand. You can apply static grass, leaf little and other details to the base once it's painted, to create some more striking visuals - we'll cover this in more detail in another article.
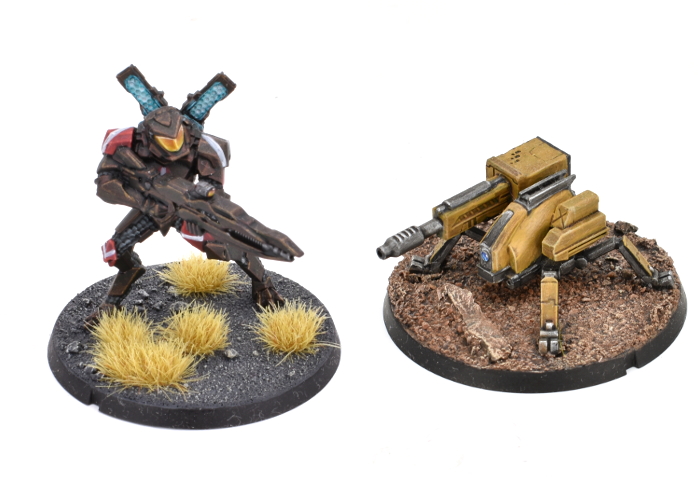
Adding extra detail is particularly worthwhile for larger bases, where there's more surface area to play with. Using a fine gravel mix instead of just sand, or gluing a few small pebbles in place with superglue before applying the sand can help to break up the flatness. You can also use pre-made, adhesive static grass tufts rather than messing about with the loose version, which can get everywhere if you're not careful!
This is, of course, just a starting point! For some other basing ideas, check out these articles:
For more modeling articles covering a wide range of different types of kits and materials, check out our Tips and Techniques, Modeling Articles and Terrain Building Articles Hobby sections.
You can find the full range of Maelstrom's Edge models in the webstore here. Be sure to share your modeling projects on the Comm Guild Facebook Group!
