Karist Kaddar Nova Assembly Guide
General Notes
Polystyrene cement - only use superglue if you want to go insane! All of our models are designed to be assembled with polystyrene cement as it gives some time to re-pose while gluing, fuses the models together and prevents brittle joins like other glues do. Make sure you have polystyrene cement in your toolkit before you begin!
We want you to experiment! We've broken our models up into lots of parts and given a fair few spare parts so that you can push yourself out of your comfort zone, learn new skills and create some really unique models. We've tried to price things so that it won't break the bank if you make a mistake, so please cut stuff up and have some fun. Start simple with a slice here and a re-pose there, and watch your confidence and skills increase until you are a master modeler!
Basing - Always make sure you glue your model to its base with an eye on the arc markers on the sides of the base. The arc marker indents should be at the halfway point between the front and back of the model to show the front and back halves of the model when gaming. See the Maelstrom's Edge rulebook for more detailed notes on this.
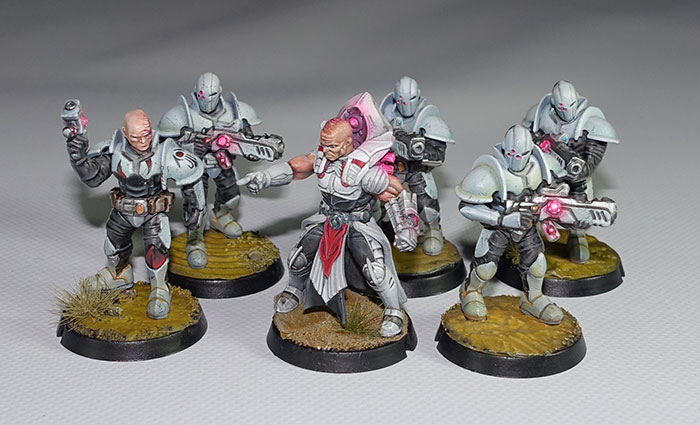
Dry fit before gluing! - There are lots of pose options possible, but that means there is also the freedom to screw up and make some bad poses! Sticking the parts together and seeing how things look will usually lead to a model that is fairly static and repetitive. You should consider knee, hip, torso, and arm positions when gluing and ensure that you have a pose in mind before you start gluing things together. If in doubt or insecure about your talents in the posing area, we recommend you try to copy the poses from some of our studio models found here in the gallery.
Kaddar Nova Assembly Notes
The Karist Kaddar Nova is assembled using the following sprue:
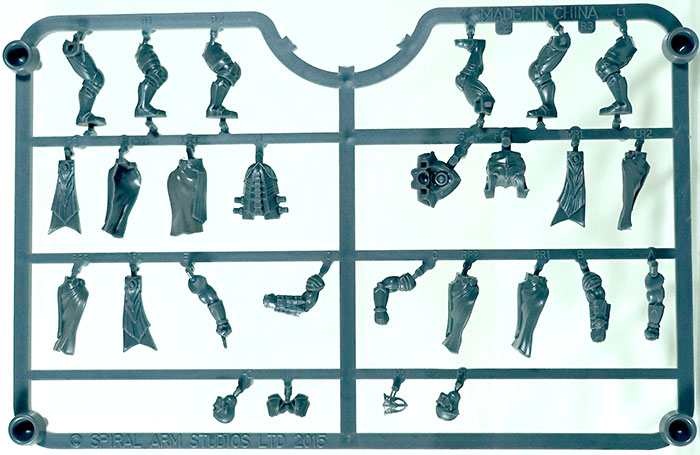
There are three leg options available on the Kaddar sprue, and they take up the bulk of the sprue. Straight facing legs (3), left leaning legs (1) and right leaning legs (2). Legs and robes parts are keyed by numbers (1, 2, 3) with examples of specific compatible components being Left leg (L1), Right leg (R1), Left Robe (LR1), Right Robe (RR1), and Middle Robe (MR1).
One key point with leg assembly is that you must wait for stages to glue and set before moving on!
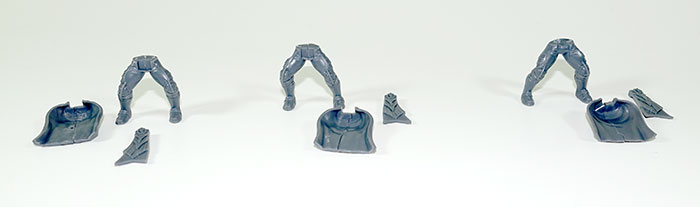
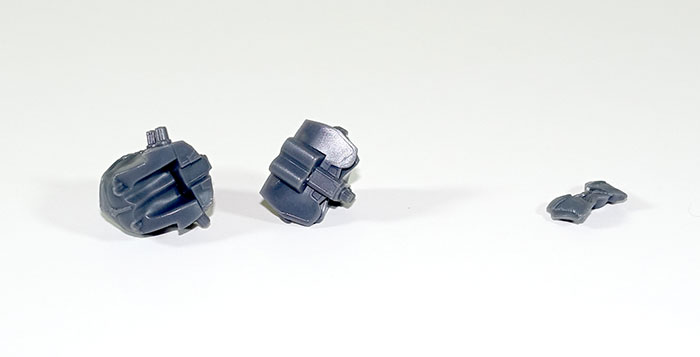
When assembling the robe, glue the left/right robe halves together first, let them dry and make sure you apply glue along the seam of robe or it can end up with a bad gap that is a pain to clean.
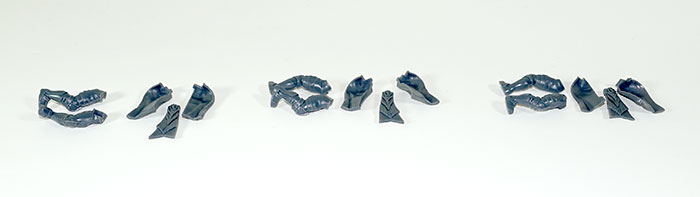
After gluing everything together the legs should look like this:
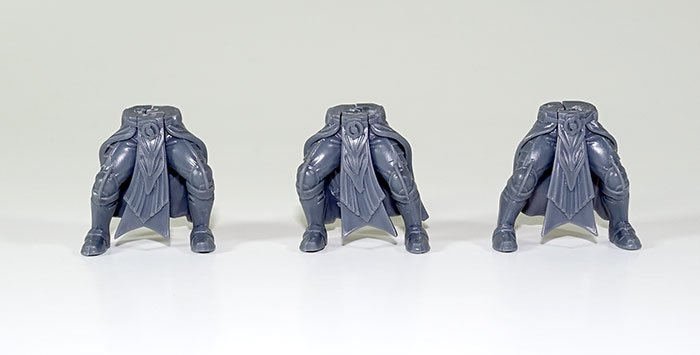
Dont worry too much about gaps on the front of the robes or top of the leg joins, they will be hidden in the final assembly. Make sure that the rear robes are as flush as possible though! The upper part of the rear (buttocks and higher) will be hidden by the Kaddar's power pack so no need to drive yourself crazy trying to get a perfect flush fit there either.
Conversion opportunity: on all leg poses, both feet are angled straight on. If you cut the hip join on the legs and angle the feet slightly to the side, you'll find it is a nice effect to allow for even more posing variance and is quite an easy conversion as the robes hide the cuts at the model's hips.
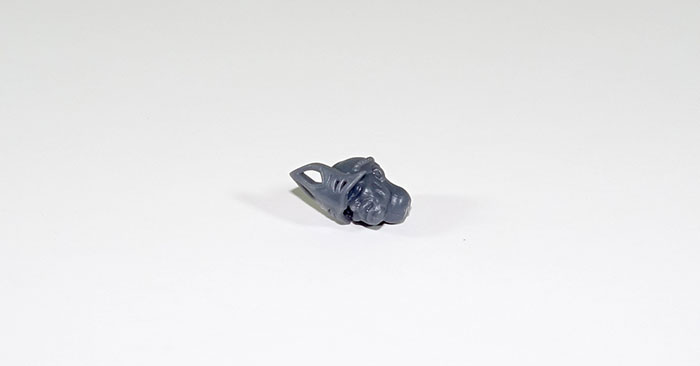
There are two head options - masked/crowned and bare head. The mask version uses parts M1 and H1 and is built like this with the tips of the mask running below the head cabling:
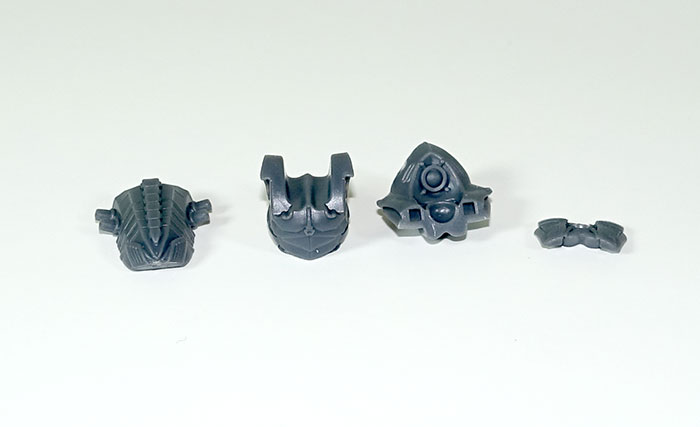
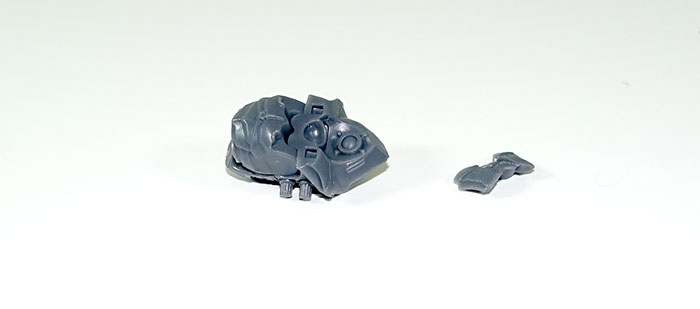
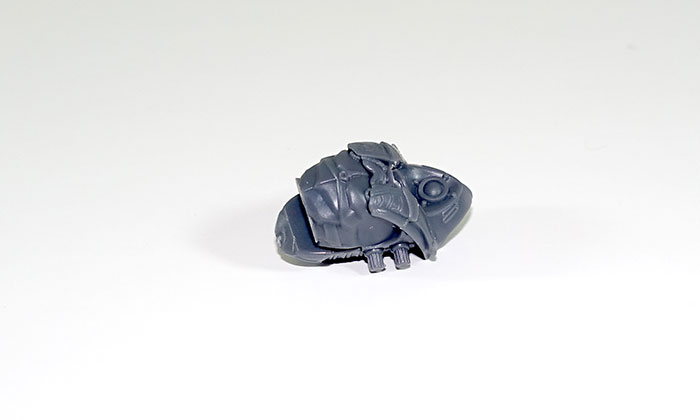
The torso/backpack assembly uses parts F, G, J and I and is assembled as follows:
There are plenty of arm options to play with, and the arm connection space on the torso is quite spacious and flexible. Some arm poses only work with certain angles, so once again be absolutely sure to dry fit and try to have a vision of what you are trying to accomplish with the pose. When using leaning legs, the 'off' arm being one of the bent/angled arms tends to work best visually.
Conversion opportunity: If you want to twist the angle of the torso on the legs, doing so can work well but we would recommend a touch of greenstuff on the top rear of the robes to pad it in a neater fashion and avoid an unsightly gap.
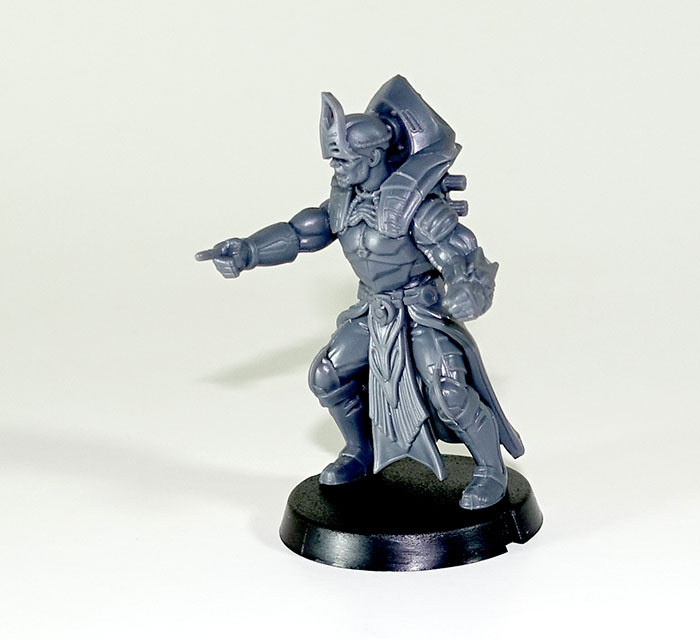
The finished model: