Assembling Karist Tempest Elites
General Notes
Polystyrene cement - only use superglue if you want to go insane! All of our models are designed to be assembled with polystyrene cement as it gives some time to re-pose while gluing, fuses the models together and prevents brittle joins like other glues do. Make sure you have polystyrene cement in your toolkit before you begin!
We want you to experiment! We've broken our models up into lots of parts and given a fair few spare parts so that you can push yourself out of your comfort zone, learn new skills and create some really unique models. We've tried to price things so that it won't break the bank if you make a mistake, so please cut stuff up and have some fun. Start simple with a slice here and a re-pose there, and watch your confidence and skills increase until you are a master modeler!
Basing - Always make sure you glue your model to its base with an eye on the arc markers on the sides of the base. The arc marker indents should be at the halfway point between the front and back of the model to show the front and back halves of the model when gaming. See the Maelstrom's Edge rulebook for more detailed notes on this.
Dry fit before gluing! - There are lots of pose options possible, but that means there is also the freedom to screw up and make some bad poses! Sticking the parts together and seeing how things look will usually lead to a model that is fairly static and repetitive. You should consider knee, hip, torso, and arm positions when gluing and ensure that you have a pose in mind before you start gluing things together. If in doubt or insecure about your talents in the posing area, we recommend you try to copy the poses from some of our studio models found here in the gallery.
Tempest Elite Assembly Notes
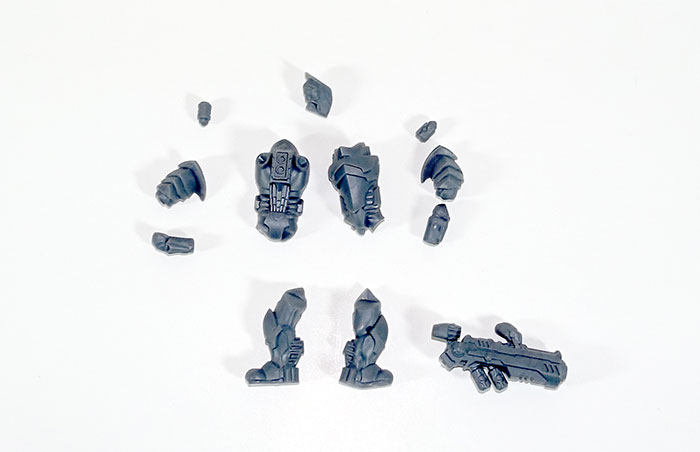
Two Karist Tempest Elites can be made from the following sprue:

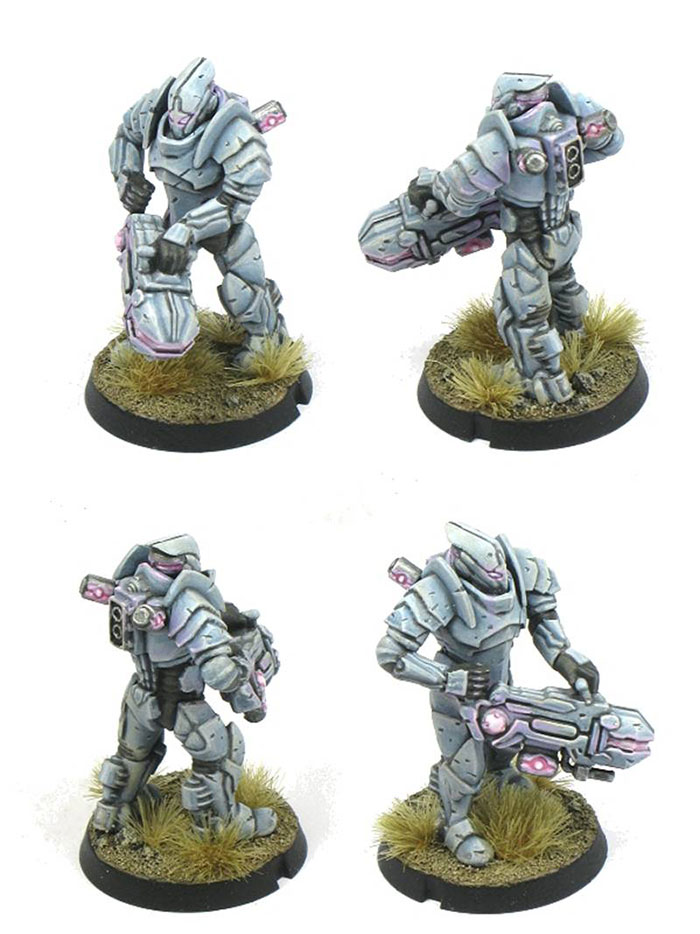
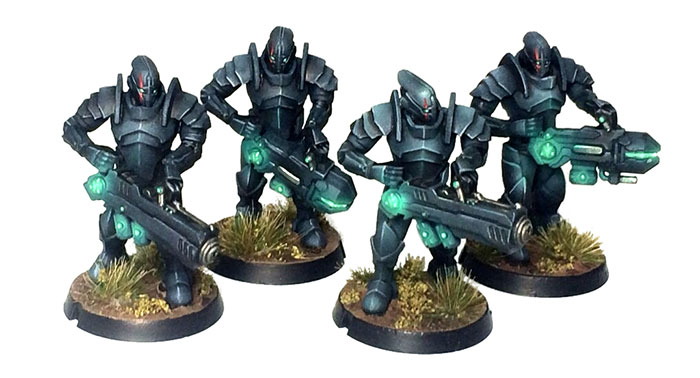
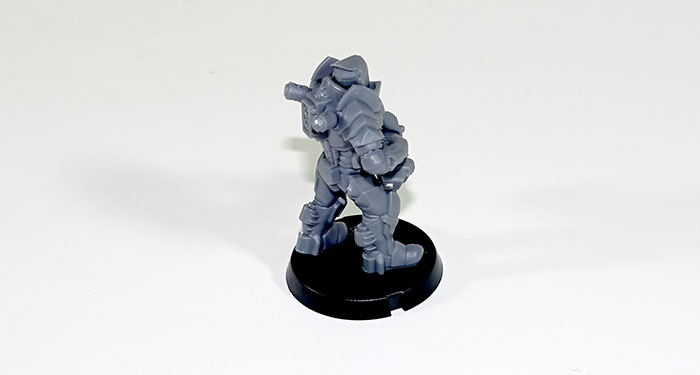
Karist Tempest Elites are a fun kit to build but have relatively limited posing compared to some of our other kits due to the combined torso and hips. They are also the most difficult and challenging kit to build in the Maelstrom's Edge: Battle for Zycanthus set. There is one error on the sprue labelling in that both bodies are labelled A/B, when in fact the bodies are different. If you look at the sprue, the top half builds one model, whereas the bottom half builds the other. Be sure to match legs C with the body nearest them on the sprue, and likewise legs D with the body nearest those. As with the Karist Troopers, be sure you trim the sprue connection points flush from the leg joins so that the legs attach as seamlessly as possible. Pay attention to the position of the feet when gluing the legs so that you dont end up with an off-balance model too!
The arms are interchangeable with either body, so once the legs are attached, you are free to build how you like.
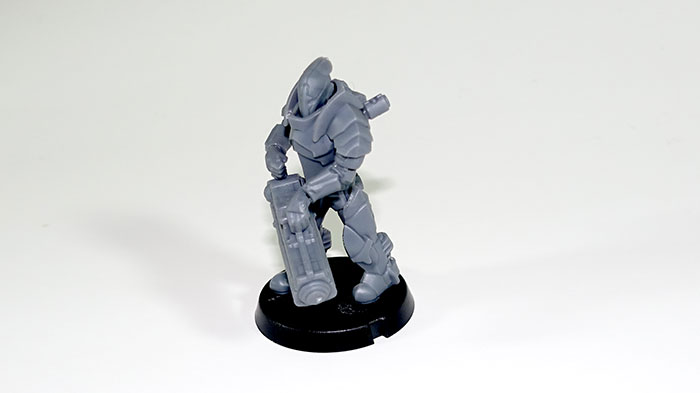
The arms can be quite fiddly to assemble as there are five items required for assembly (2x shoulder, 2x forearm, 1x gun). You will have a much easier time if you are using polystyrene cement as you can adjust while it is curing. Arms share letters for compatible/matched parts, specifically F and G. All 'F' parts need to be assembled together, as do all 'G' parts. Mixing will lead to strange poses but is possible if you are tring to convert. F3 and G3 are the model's right forearm, and F4 and G4 are the model's left forearm. Glue the shoulder pads on first, then the forearms, then the weapon.
Two weapons are available - the Ravager Pulse Cannon (part I) and the Coriolis Energy Launcher (part H). The Hellstorm Energy Mortar is a beefed up version of the Coriolis (part H), and while it uses the same part, would benefit on the tabletop from a paintjob that shows the weapon is more intense (typically represented by a stronger glow, veterancy markings on the trooper holding the weapon, etc).
The one part that people tend to miss when assembling the Tempests is part J. Two of these should fix in to the back of the body (part A) in the indents at the top, as the Tempest's armour is powered by cybel energy contained in those cybel cannisters.
The heads have a reasonable range of pose available, but the addition of a touch of greenstuff will allow you a greater vertical range of posing instead of just the left/right posing range they have by default.
The Tempest sprue was the first we completed and has a few rough edges compared to our other models as we learned. The 5 part arms/guns are due to the forearm armour plating being a design that needs to be split in injection moulded tooling, and the main side effect of that was that it became very difficult to test the sprues before production due to the size of the pieces, and was made even more complicated by the size of the ravager pulse cannon. As such, the keying on the left forearm/shoulder connection is slightly off, so we recommend you affix the gun while the forearm glue is still curing so that you can adjust as desired. A simple but effective conversion for improving the Tempests is to take a tiny slice of plastic off the left wrist forearm connection point to allow a softer angle on that wrist.
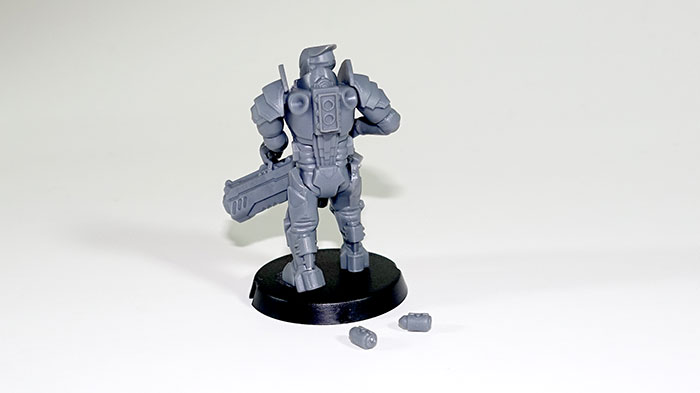
Here is a Karist Tempest Elite that has had its arms trimmed ever so slightly, creating a non-stock assembly which is an easy conversion to attempt: