


Working with Putty
Sometimes even well-designed models can wind up with some visible gaps here and there after assembly, particularly when you are cutting or otherwise modifying parts. You might also want to add new details to your models, or make some custom pieces. For these jobs, you need some modeling putty in your toolbox.
Here, we'll run through some common ways to use putty to finish your models.
So... What is it? - Modeling putties come in two main types - filling putty, or two-part epoxy putty.
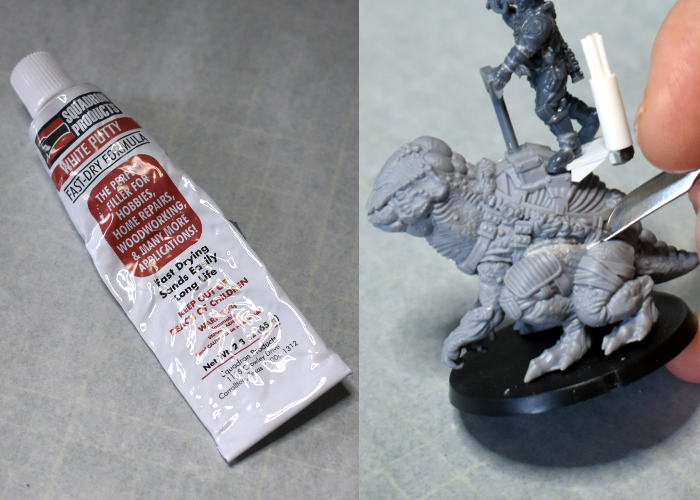
Filling putties are air-drying pastes or liquids that can be applied into gaps. Using this sort of putty is usually just a case of applying it into the gap by squeezing it out directly onto the model or using a tool to push it into tight spaces. You can use a tool to smooth it down while wet, or let it dry and sand or trim it down to shape.
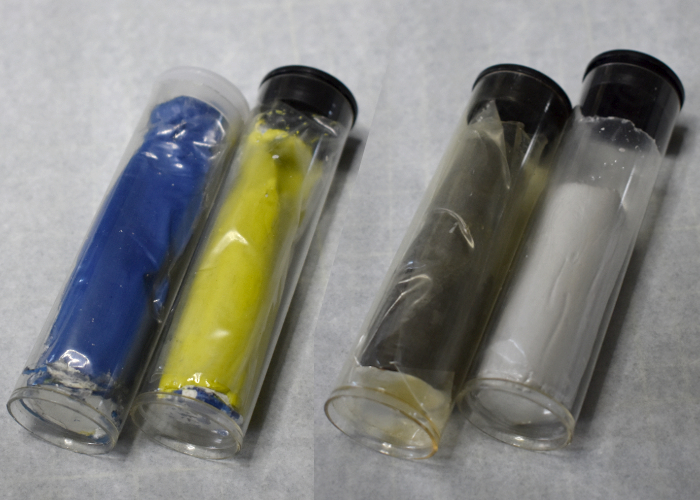
Epoxy putties come with two, usually differently-coloured components that are mixed together. Once mixed, the putty is workable for a time until it hardens, after which it can usually be cut or sanded. The most common of these sorts of putties is Kneadatite, also known amongst hobbyists as 'Green Stuff' due to being made up of blue and yellow components that turn green when mixed.
Sculpting Tools - There are a wide range of different tools available for poking, prodding and smoothing your putty into place. Some sculptors also like to use dentist's tools, or make their own. It can be difficult to know what sort of tools will work best for you, as different sculptors find that certain types of tools work better for them personally. The best bet is to start with a couple of basic smoothing and shaping tools, and then expand your collection as you need something different.
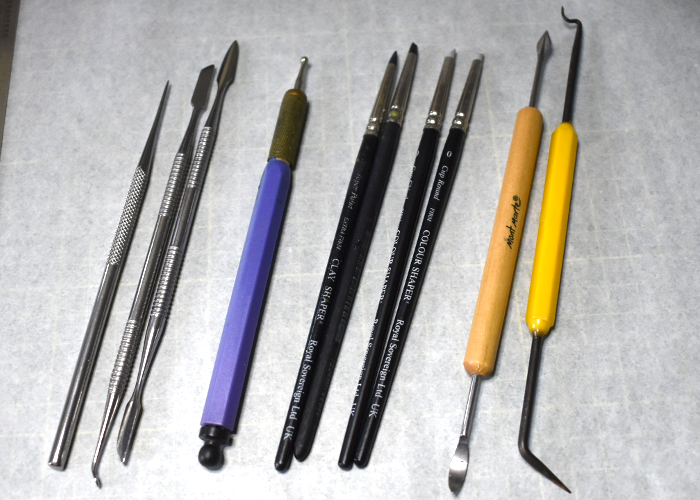
Tools for this sort of putty are usually either made of metal, or wooden handles with shaped silicon tips (known as 'clay shapers' or 'colour shapers'). Silicon tools work well for fine detail work and smoothing, and rarely stick to the putty. Metal tools can stick, and so need to be lubricated with a little water or petroleum jelly, but can be better for stronger putty pushing or sharp edges. As mentioned above, find what works best for you!
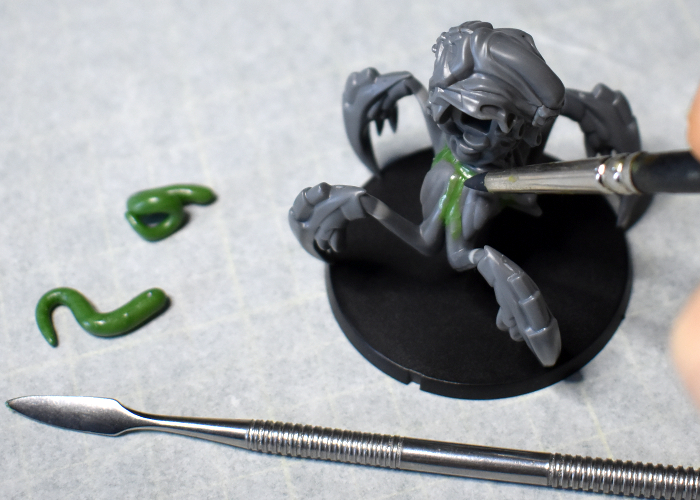
Gap Filling - For basic gap filling, you're best off using a filling putty as mentioned above. You can also use two part putty, by pressing a thin sausage of putty into the gap and then smoothing it down over the surface. You can also use your tools to shape the putty to match surface details.

If you can't get the putty smoothed down perfectly flat, you can let it set and then use a knife to trim it down, or use fine sandpaper or a file to sand it down.
Tentacles - To venture out beyond the gaps, basic tentacles are one of the easiest things to sculpt from green stuff. Just roll out a long sausage of putty on some grease-proof paper. Use a flat ruler or another piece of paper to roll the putty so that you don't leave fingerprints on it. Once you have the length and thickness you want, you can carefully shape the tentacle into a suitably organic shape and pin it in place using some wire or brass rod.
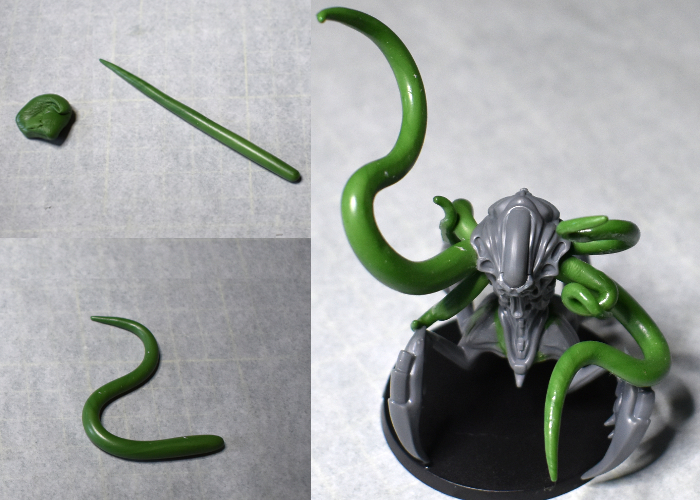
For a larger tentacle, you may want to let it set before gluing it in place to avoid it drooping out of shape while the putty is still soft. Once you have set it in place, you can use smooth some more putty around the end to blend it into the model.
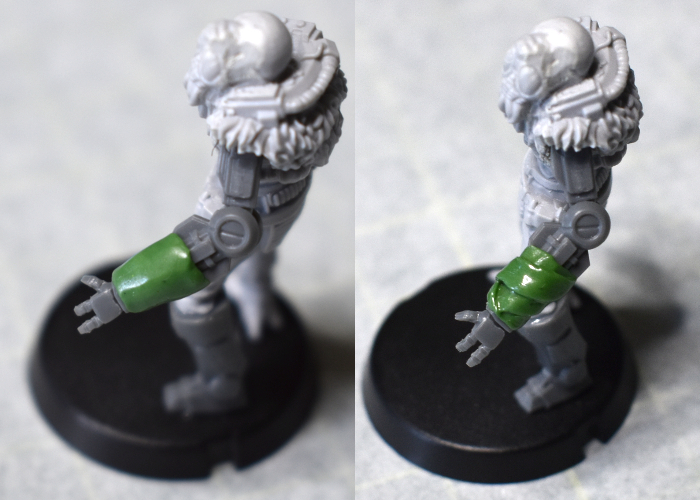
Bandages and Bindings - You can easily add cloth bindings to models by wrapping a thin layer of putty around the part, smoothing it down and then using the side of a tool to etch a bandage edge around it. Keep the lines more or less parallel for a neat effect, or vary the angles and add some protruding scrap ends for a more rag-tag look.
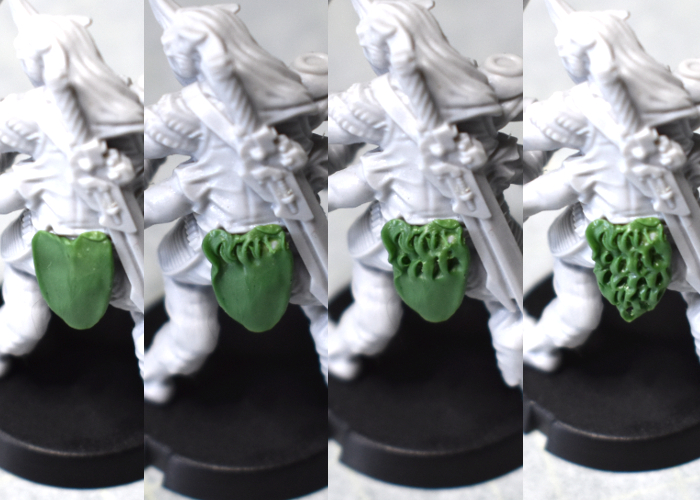
Fur - Add fur to your models by spreading a layer of putty over the area, and then using a tool to crease up the putty into narrow, pointed ridges. Work along one row, and then move down slightly and add a second row. Repeat for the entire length of the fur piece.
Obviously, the above is only scratching the surface. You can find some other, more specific sculpting tutorials in the Tips & Techniques section, and there will be more to come. You can also find an endless supply of sculpting tutorials online from various different sculptors and hobbyists - search on YouTube for Green Stuff Tutorials and see what you turn up!
For more modeling articles covering a wide range of different types of kits and materials, check out our Tips and Techniques, Modeling Articles and Terrain Building Articles Hobby sections.
You can find the full range of Maelstrom's Edge models in the webstore here. Be sure to share your modeling projects on the Comm Guild Facebook Group!
