Assembling Epirian Drones
General Notes
Polystyrene cement - only use superglue if you want to go insane! All of our models are designed to be assembled with polystyrene cement as it gives some time to re-pose while gluing, fuses the models together and prevents brittle joins like other glues do. Make sure you have polystyrene cement in your toolkit before you begin!
We want you to experiment! We've broken our models up into lots of parts and given a fair few spare parts so that you can push yourself out of your comfort zone, learn new skills and create some really unique models. We've tried to price things so that it won't break the bank if you make a mistake, so please cut stuff up and have some fun. Start simple with a slice here and a re-pose there, and watch your confidence and skills increase until you are a master modeler!
Basing - Always make sure you glue your model to its base with an eye on the arc markers on the sides of the base. The arc marker indents should be at the halfway point between the front and back of the model to show the front and back halves of the model when gaming. See the Maelstrom's Edge rulebook for more detailed notes on this.
Dry fit before gluing! - There are lots of pose options possible, but that means there is also the freedom to screw up and make some bad poses! Sticking the parts together and seeing how things look will usually lead to a model that is fairly static and repetitive. You should consider knee, hip, torso, and arm positions when gluing and ensure that you have a pose in mind before you start gluing things together. If in doubt or insecure about your talents in the posing area, we recommend you try to copy the poses from some of our studio models found here in the gallery.
Epirian Drone Assembly Notes
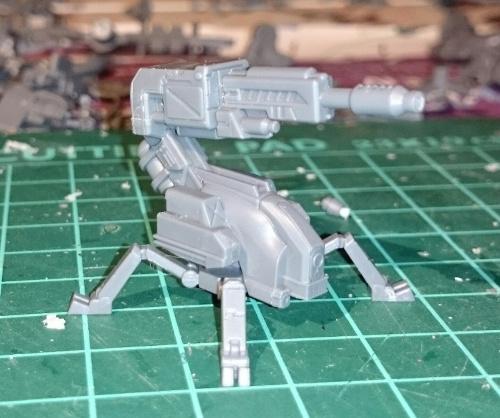
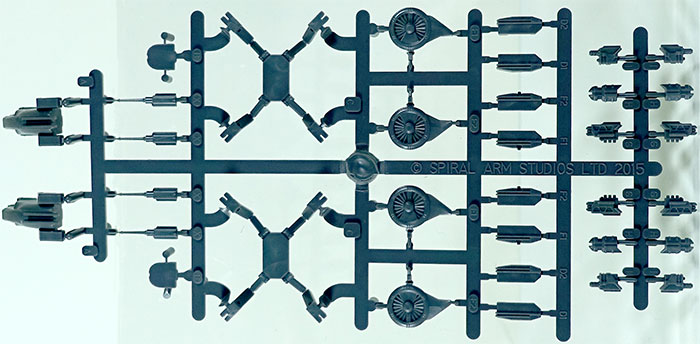
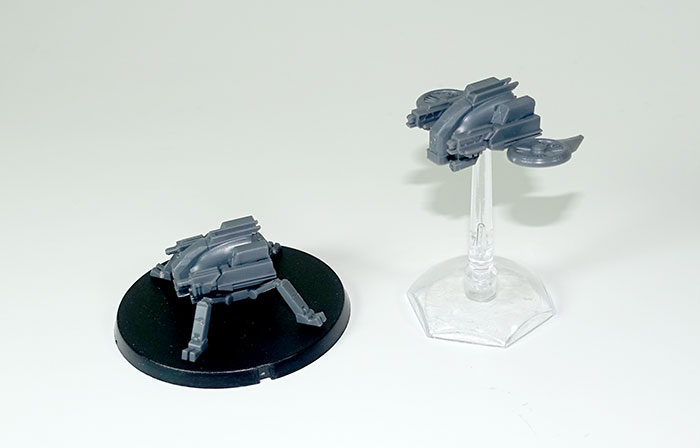
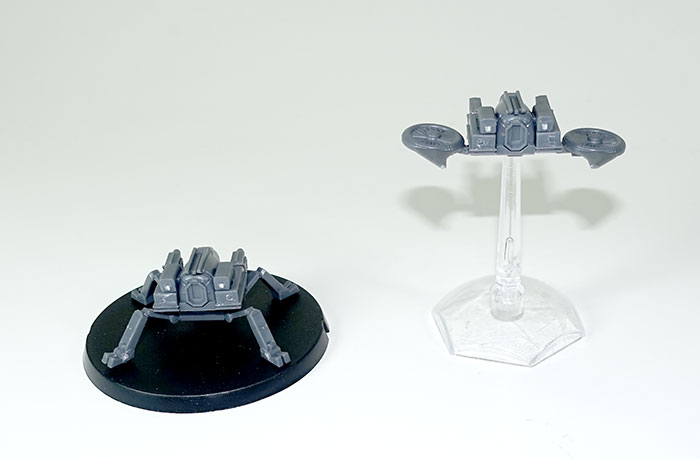
Two Epirian Drones, either Firefly or Spider types can be made from the following sprue:
The Epirian Drone sprue builds both firefly (airborne) and spider (ground) drones. The assembly is very similar for both and quite straightforward.
The most important thing before you begin is deciding on the weapons you want to equip your drones with. Spider Drones use the cutter machine gun (part I) or the Flakk Gun (part H) and Firefly drones use the DCLS (part G).

When we designed the Drone sprue, we found we had a little bit of extra space and were able to include part X - very thin guns from our draft drone design which are a probably bit too delicate for gaming but look great and may get some rules in the future. They are very useful parts if you want to chop them up and make some additional antenna for your buildings, robots or handlers too.
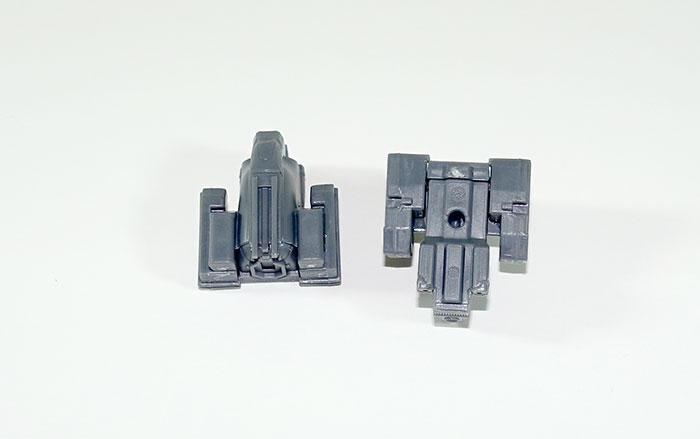
Assembling the drone bodies is the same on both types of drone - simply attach the exhaust/propulsion (part B) to the rear of the body (part A). The exhaust part is fractionally offset and not supposed to be a flush fit.

Next, attach the side parts. Use parts D1 and D2 for spider drones and F1 and F2 for firefly drones. The difference is that F1 and F2 have small notches for the steering turbines (E1/E2) to be attached to. You should resist the temptation to make the join flush and instead focus on keeping the side elements so that they are at right angles to the drone body, ensuring the guns (when attached) will point forwards and not off to the sides slightly.
Ensure that the guns are completely cleaned of the sprue connection point so that they get a flush fit with the side of the drone, and be careful to ensure that they are pointing forwards and do not end up with a cross-eyed effect from being glued at an off angle.
Finally attach either the legs (part C) for Spider drones and glue the model to a medium base, or attach the turbines (E1/E2) and affix the model to a flight base. When attaching legs, you can play around with some fun conversion opportunites by stuffing the hole on the bottom of the drone with greenstuff (or even bluetac and glue), then pulling the legs out and twisting them around a bit. The leg joint is keyed, so if the legs do not slot in deep enough, try turning the legs 180 degrees and inserting again. The turbines have a lot of posing flexibility as well and have enough wiggle room to be posed in various degrees up/down and front/back facing. We generally aim for symmetry on the left and right with our turbines though as we prefer the effect that way.
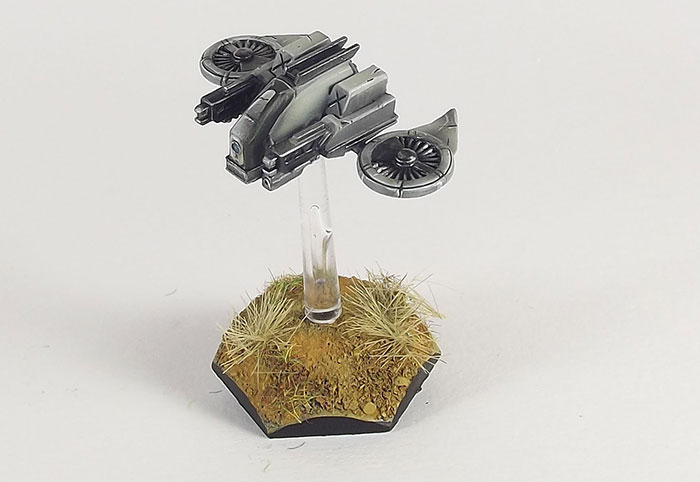
You can clip the top of the flight base off and affix a 3mm cylindrical magnet, then insert a 2mm magnet in the bottom of the firefly drone to create a snap on/snap off flight sprue which makes transporting your firefly drones much easier. You can even cut the flight stand at an angle to allow you to pose your firefly drones in various banking positions.
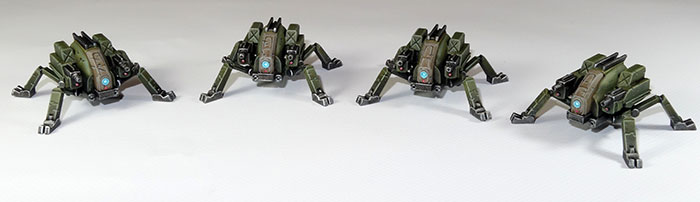
Spider drones can benefit nicely from raised and heavily textured bases showing them scrambling over shallow inclines, rubble, etc. Here's a conversion creating a unique form of 'Scorpion' drone using scarecrow and hunter spare parts: