Assembling Epirian Hunter-class Warmechs
General Notes
Polystyrene cement - only use superglue if you want to go insane! All of our models are designed to be assembled with polystyrene cement as it gives some time to re-pose while gluing, fuses the models together and prevents brittle joins like other glues do. Make sure you have polystyrene cement in your toolkit before you begin!
We want you to experiment! We've broken our models up into lots of parts and given a fair few spare parts so that you can push yourself out of your comfort zone, learn new skills and create some really unique models. We've tried to price things so that it won't break the bank if you make a mistake, so please cut stuff up and have some fun. Start simple with a slice here and a re-pose there, and watch your confidence and skills increase until you are a master modeler!
Basing - Always make sure you glue your model to its base with an eye on the arc markers on the sides of the base. The arc marker indents should be at the halfway point between the front and back of the model to show the front and back halves of the model when gaming. See the Maelstrom's Edge rulebook for more detailed notes on this.
Dry fit before gluing! - There are lots of pose options possible, but that means there is also the freedom to screw up and make some bad poses! Sticking the parts together and seeing how things look will usually lead to a model that is fairly static and repetitive. You should consider knee, hip, torso, and arm positions when gluing and ensure that you have a pose in mind before you start gluing things together. If in doubt or insecure about your talents in the posing area, we recommend you try to copy the poses from some of our studio models found here in the gallery.
Hunter Assembly Notes
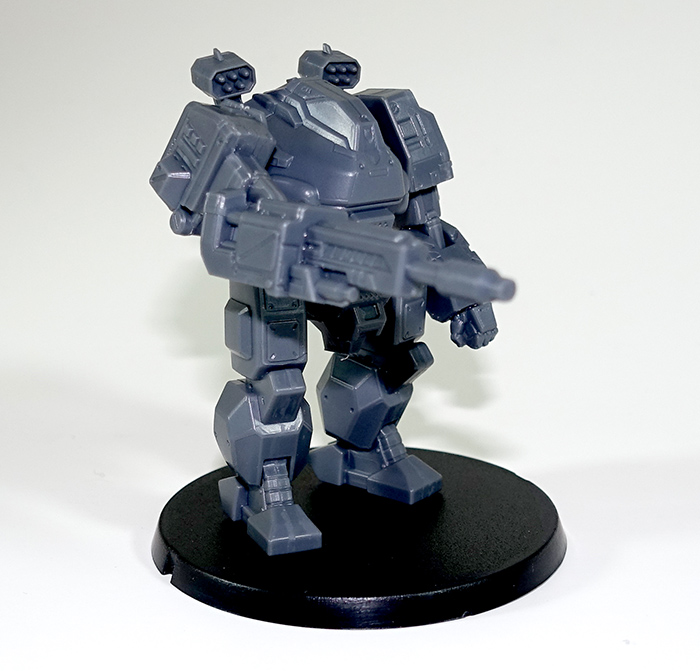
The Epirian Hunter-class Warmech is made up from three sprues of parts.
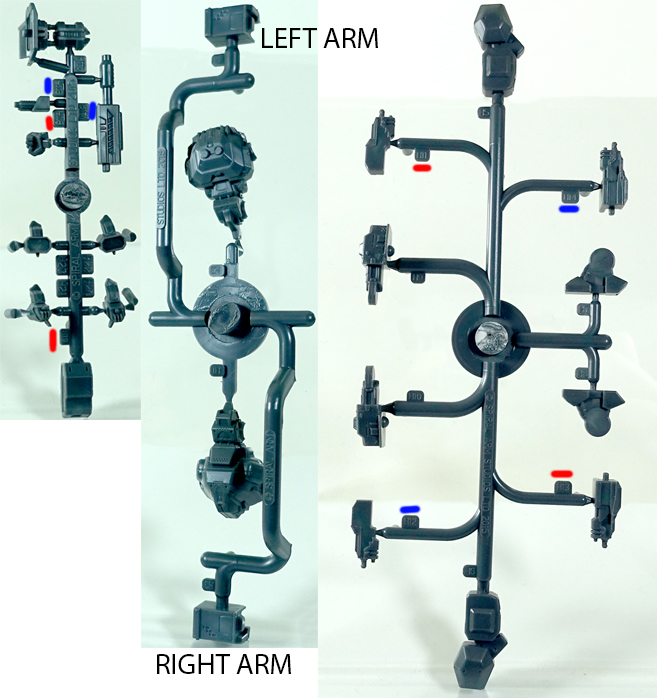
The first thing to decide when building your Hunter is what weapon loadout it should have. The guns and rockets are the easiest things to assemble incorrectly, so please note the following:
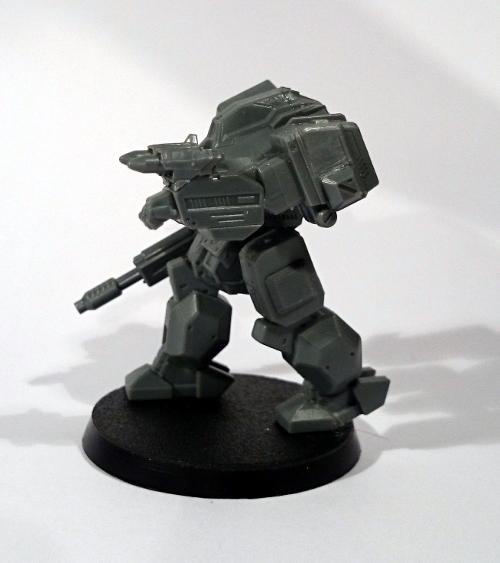
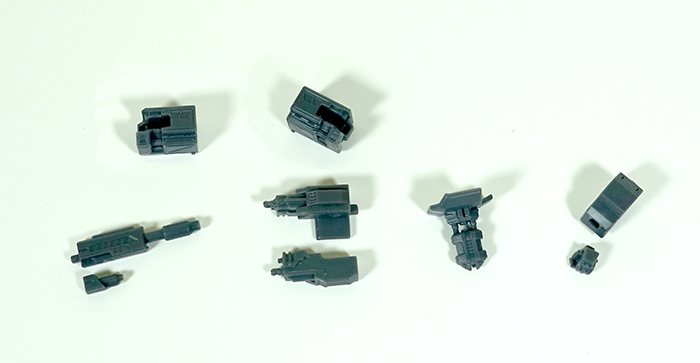
The Maglock Chaingun consists of three parts and can only be on the Hunter's right arm. The three parts are H3, H16 and H17. Please note in the images below, that part H16 (the tiny gun) slots in to the side of H17 (the big gun), then both parts are glued into the rear part of the gun - H3.
The Suppressor Dual Machine Gun has three parts, and enough are provided on the sprue to equip both the left and right arms at the same time. When assembling, please note that the guns use diagonally opposite parts on the sprue - when assembling the two parts of the front of the gun, flat detail should go on the inside. H11/H13 and H12/H14 are the pairs to use when building the front part of the gun, and they then fix into H4 and H3 for left and right arms accordingly.
The Flakk Cannon has two parts (H4 and H15) or (H3 and H15) depending on if you want to put it on the left arm or right arm. The front gun part is (effectively) symmetrical so can simply be turned upside down as desired when switching sides.
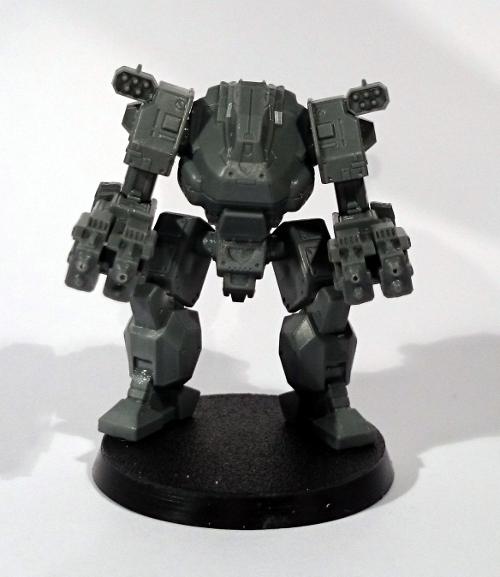
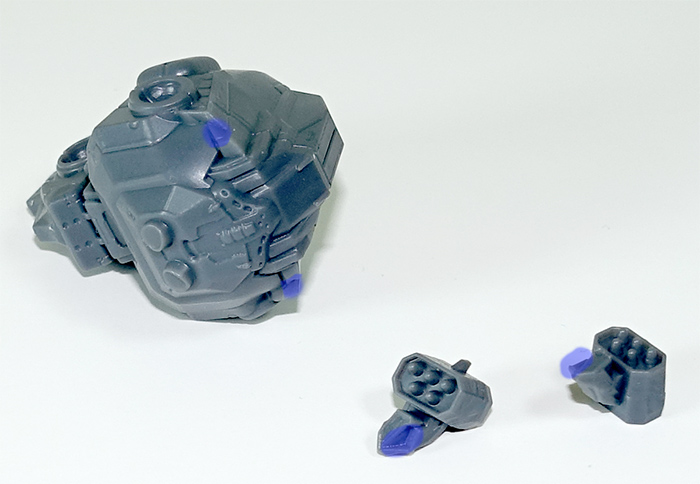
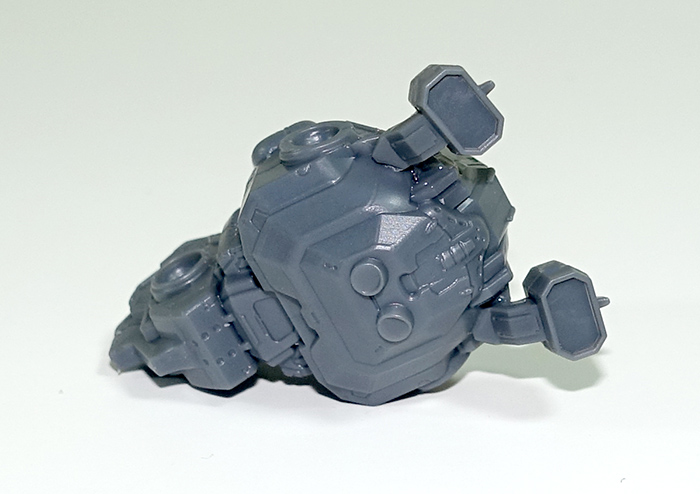
Cluster Missile Pods (multiple small rockets) and Strike Missile Pods (single rockets) are optional extras and are not hugely intuitive for where to glue them to the model. Here's a shot of the back of an assembled torso with the attachment points highlighted, as well as a shot of the torso when cluster missiles are attached. We highly recommend you look at the front of the model when applying missile pods to the torso so that you can get the fit just right.
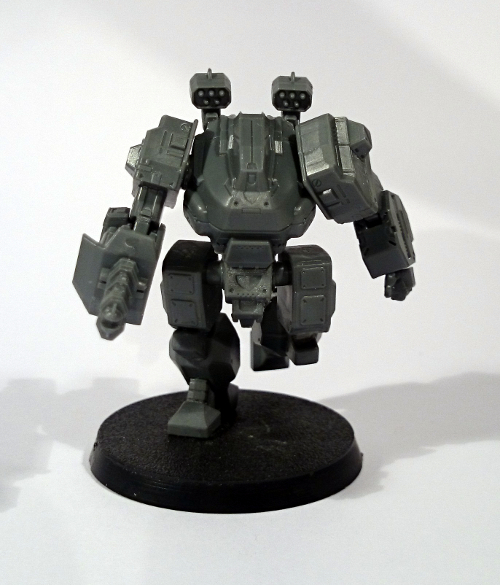
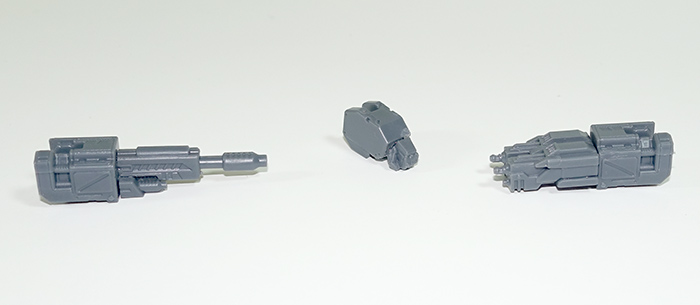
The Hydraulic Fist (part H18) simply slots into part H19 and is only suitable for the model's left arm. When attaching the hydraulic fist, if you want to push your talents, we recommend you cut the connecting peg off the hand, put the detached peg into the socket in the forearm, and then position the rest of the hand however you like. The default pose of just pushing the hand in to place works fine (see our gallery models for lots of examples), but that one small tweak can really open up the dynamism of the model.
Feet We recommend you twist the feet off the sprue as this will give a clean shearing surface with a flat or easy to clean point, ensuring a flush fit between the feet and the base. We also find twisting gun parts H3/H4 off the sprue is ok - it leaves a textured circle, which can be a bit more of a pain to clean up, but overall it is a neat mess which is not very visible on the finished model and is less annoying to clean up than slowly shaving back a large part of the sprue's runners.
General Notes
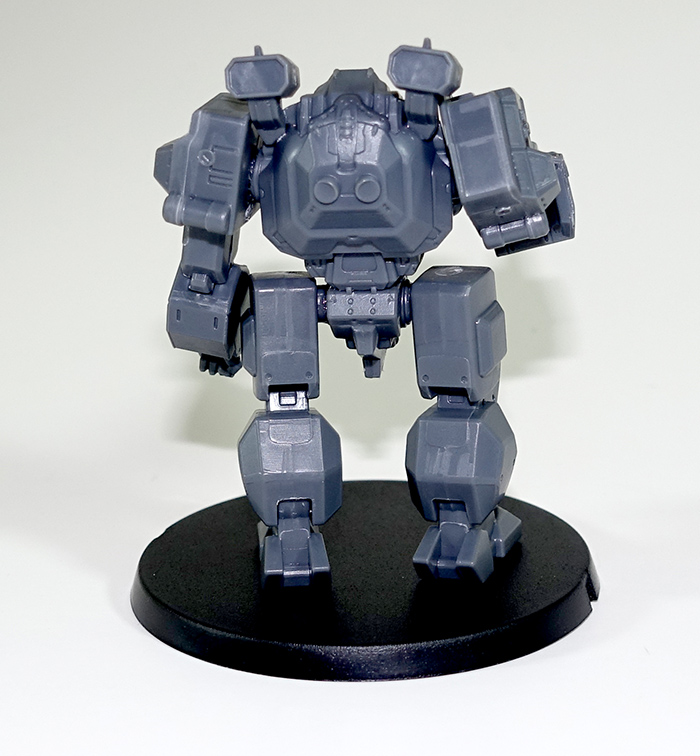
We recommend you assemble the torso first, then the legs, then the arms after that (to make sure the arms fit in place next to the legs with the big guns!). You should glue both feet and both legs at the same time to allow for on-the-fly adjustments. Angling the legs out slightly or angling one of the feet to make the model appear to be walking or climbing leads to a good effect, and having the model slightly climbing over an object on its base can look quite nice as well. Gluing both legs side by side with feet flat on the base can lead to the model looking quite stiff, so as always, dry-fit and test first!
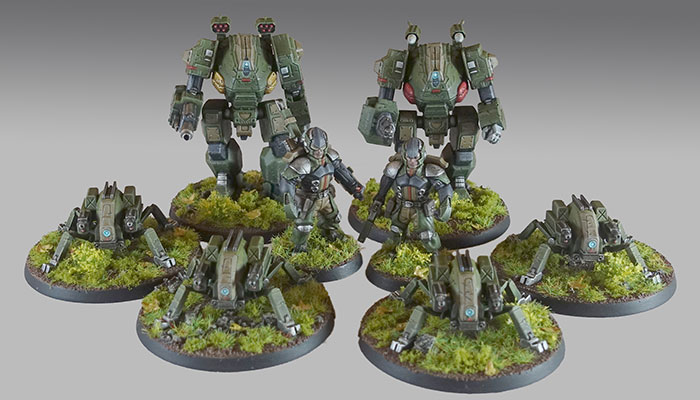
Conversions
Here are a few conversions done by friends of ours to help inspire any advanced assemblies you might want to try!